Dads Chocolate Trifle

Today I bring you my Dad’s Chocolate Trifle. I remember when I was little my mom and I would make this for Father’s Day. This dessert is perfect and quick! This year I did not put any candy in the trifle but typically we use crushed Heath Bars in between the layers. I used a box brownie mix but you could also make homemade. I use Cool Whip since it is stabilized, I suppose you could make homemade whipped cream but I am not sure how it would hold up for a few days in the fridge.

Dads Brownie Trifle via LashesandDashes

Dads Brownie Trifle via LashesandDashes

Dads Brownie Trifle via LashesandDashes

Dads Brownie Trifle via LashesandDashes


Ingredients: 

1 boxed brownie mix, made and cut into 1 inch pieces

1 container Cool Whip

1 box chocolate pudding, prepared according to package

1 trifle bowl or small punch bowl

Optional: Crushed Candy


Directions:

Layer in brownie pieces, make sure to cover bottom of bowl. Next layer in pudding. After that if you choose layer in crushed candy. Next layer in Cool Whip. Repeat layers. I did two complete layers then crumbled bownie on top of the last layer of Cool Whip. Can be made up to a day in advance. Enjoy!

Patriotic Trifle

I made this trifle for Memorial Day, I got the idea from Mels Kitchen Cafe, I used her recipe as a jumping off point. I love trifles for their simplicity but it looks like you spent hours.  You can make everything homemade or you can buy it from the store. I made the blueberry filling homemade but bought the cherry filling. We had friends and family over for Memorial Day and they gave this dessert a thumbs up!  On a side note please bare with me in the next few weeks as there may be some exciting changes coming to Lashes and Dashes 🙂

Patriotic Trifle via LashesandDashes

Adding water to the blueberries.

Patriotic Trifle via LashesandDashes

Adding in the cornstarch.

Patriotic Trifle via LashesandDashes

In goes the sugar.

Patriotic Trifle via LashesandDashes

All of the ingredients for the blueberry filling in the pot.

Patriotic Trifle via LashesandDashes

The blueberry filling cooking.

Patriotic Trifle via LashesandDashes

The blueberry filling cooked and cooling.

Patriotic Trifle via LashesandDashes

Adding condensed milk to softened cream cheese.

Patriotic Trifle via LashesandDashes

The cream cheese filling.

Patriotic Trifle via LashesandDashes

Making whipped cream.

Patriotic Trifle via LashesandDashes

The cake mixture layer on the bottom.

Patriotic Trifle via LashesandDashes

The blueberry filling layered on.

Patriotic Trifle via LashesandDashes

The whipped cream layer.

Patriotic Trifle via LashesandDashes

Note: I used a Angel Food Box mix and used about 3/4 of the cake. You could also use a store bought cake which the original recipe said is the perfect size. If you choose to decorate the top of the trifle keep the other portion of the cake. I used canned cherry pie filling but you can also make homemade cherry filling the same way you made the blueberry.

Ingredients 

Blueberry Filling:

12 ounces frozen blueberries
2 tablespoons granulated sugar
2 tablespoons cornstarch
1/4 cup cold water
Squeeze of fresh lemon juice (about 1/2 tablespoon)

Cherry Pie Filling.

Cake and Cream:

Baked, cooled and cubed angel food cake (see note)
16 ounces light cream cheese, softened to room temperature
2/3 cup half-and-half or evaporated milk (can use skim evaporated milk)
2/3 cup granulated sugar

Whipped Cream:

1 1/2 cups heavy cream
3 tablespoons powdered sugar

Directions

DIRECTIONS

For the blueberry filling, in a medium saucepan, combine the blueberries, sugar, cornstarch, water and lemon juice. Bring the mixture to a simmer and cook until thickened, 5-7 minutes, stirring often. Remove from the heat and let cool to room temperature. For the cake and cream layer, in a blender or with an electric mixer (handheld or stand mixer), whip together the cream cheese, half-and-half or evaporated milk and sugar until smooth and creamy. Transfer the mixture to a bowl if you used a blender. Fold in the angel food cake cubes. Keep in mind (from the note above) that you may not use all the cake cubes, especially if using an angel food cake mix. Add cake cubes until they are all thickly coated with a layer of cream. If making this in advance, it can dry out if there is too much angel food cake added. For the whipped cream, beat together the heavy cream and powdered sugar until peaks form. To assemble, in a trifle dish or in a large glass bowl, spread half of the angel food cake mixture. Top with half of the blueberries, spreading evenly across, and then spread half of the sweetened whipped cream. Then spread half of your cherry filling. Repeat the layers but keep out small amount of blueberry and cherry filling as well as small amount of whipped cream. If you would like to decorate the top of the trifle use extra angel food cake chunks around the outside edge of trifle, then using the leftover cherry filling make a circle around top of cake. Using the leftover whipped cream make a smaller circle then place a small dollop of blueberry filling in the middle to finish the trifle off.
Cover and refrigerate at least 2 hours or up to 24 hours. Serve chilled.

Chateaubriand Recipe

Chateaubriand via LashesandDashes

The finished product.

For Mothers Day here in the US,  I made Chateaubriand, My parents had Chateaubriand the night they were engaged. so it was very special for my Mom. For my first ever traditional French meal I think it turned out wonderful. I made all of the sauces homemade, you can find the recipe Here. I know I will be making this dish again for special occasions! Chateaubriand is not a difficult meal if you follow the recipe.

Chateaubriand via LashesandDashes

Melting the butter.

Chateaubriand via LashesandDashes

Searing the meat.

Chateaubriand via LashesandDashes

Searing the meat on all sides.

Chateaubriand via LashesandDashes

The meat placed on a rack in my pan, ready to go in the oven.

Chateaubriand via LashesandDashes

Chopping the tarragon.

Chateaubriand via LashesandDashes

The meat after cooking in the oven.

Chateaubriand via LashesandDashes

Adding in the shallots.

Chateaubriand via LashesandDashes

Sauteing the shallots.

Chateaubriand via LashesandDashes

Adding in the red wine.

Chateaubriand via LashesandDashes

Adding in the Demi-Glace.

Chateaubriand via LashesandDashes

Tarragon being added in.

Chateaubriand via LashesandDashes

Ingredients

1 thick, center cut tenderloin, approximately 1 pound

2 tablespoons unsalted butter

2 tablespoons olive oil

Salt and freshly ground black pepper, to taste

1 shallot, minced

4 oz. full-bodied red wine

4 oz. Demi glace

1-tablespoon butter, softened

2 teaspoons minced fresh tarragon

Whole tarragon leaves, for garnish

Directions

Preheat your oven to 375º F. Liberally sprinkle salt and pepper on the meat. Preheat an oven-safe heavy skillet or saute pan over medium-high heat. Depending on your stove, this could take 4 or 5 minutes. Add the butter and oil to the pan. When the butter stops foaming, place meat in pan.With tongs, turn the meat and continue searing. If the meat sticks to the pan, leave it for another few seconds. When the sear is complete, the meat will release on its own, so be gentle and patient. Keep an eye on the heat, you may need to adjust it up or down to maintain a good “sizzle ‘ without burning the meat. Remove the meat from the pan, and place an oven-safe rack in the cooking pan. Put the meat on the rack and roast in the oven until the meat has reached an internal temperature of 125º F if you want your meat more on the rare side. I cooked the meat for 25 minutes. Put the meat on a warmed platter to rest for about 15 minutes. The temperature will continue to rise, and your meat will be a perfect medium well. While the meat is resting, prepare the sauce. You should have plenty of oil/butter left in the cooking pan. Place the pan over medium heat – careful, it has been in the oven. Make sure you have an oven mitt, because the handle can burn you. Add the minced shallot and saute until translucent, but not browned. Add the red wine. Turn the heat up to medium high and reduce by half. Add the demi-glace to the pan and reduce for a couple of minutes until the mixture is somewhat syrupy. Taste for seasonings, and add salt and pepper if necessary. Stir in the minced tarragon and remove from the heat. Swirl in the softened butter right before serving. This will help to further thicken the sauce and impart a lovely sheen. We sliced the meat in the kitchen but the traditional preparation would be to slice the meat at the table. I severed this dish with piped mash potatoes but you can use any other side you wish.


Classic French Sauces.

I made Chateaubriand a few weeks ago for my Mom on Mother’s Day. I made these two sauces for it. Both of these sauces are simple to make and are wonderful on their own as well as combined to make other sauces. First I made Espagnole Sauce which is the most time consuming of the two, the Demi-Glace uses all of the Espagnole Sauce. We had some of the Demi-Glace Sauce left after I made the Chateaubriand, so the next day I served it along with baked pork chops, it was wonderful!  These sauces will be made again and again in my house, they are so easy to make and really add something to whatever dish you are making. Check out the Chateaubriand Recipe Here.

French Sauces via LashesandDashes

Melting the butter.

French Sauces via LashesandDashes

Skimming the foam off the top of the melted butter.

French Sauces via LashesandDashes

The clarified butter.

French Sauces via LashesandDashes

The milk solids next to the clarified butter.

French Sauces via LashesandDashes

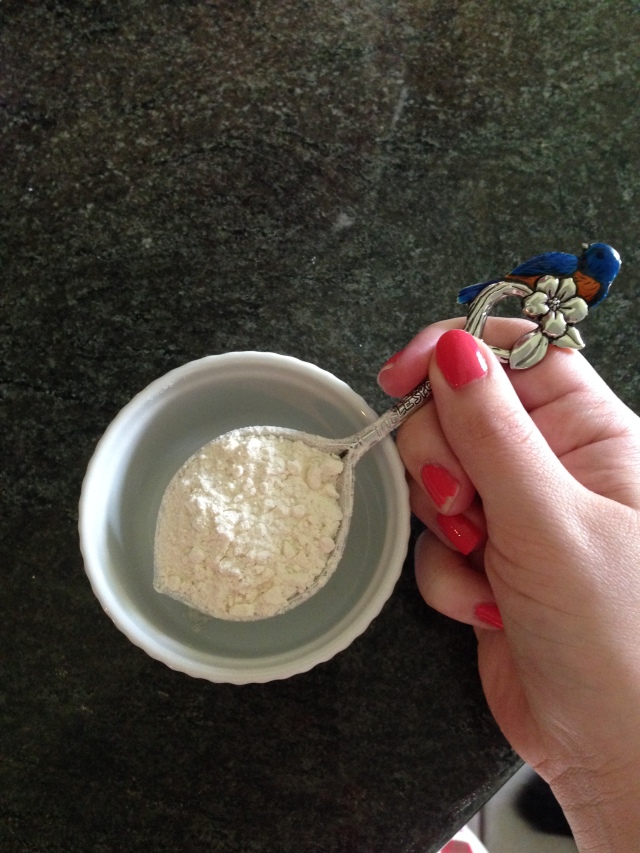
Measuring the flour.

French Sauces via LashesandDashes

Measuring the Clarified Butter.

French Sauces via LashesandDashes

Adding the Clarified Butter to my Stock Pot.

French Sauces via LashesandDashes

Adding in the chopped carrots.

French Sauces via LashesandDashes

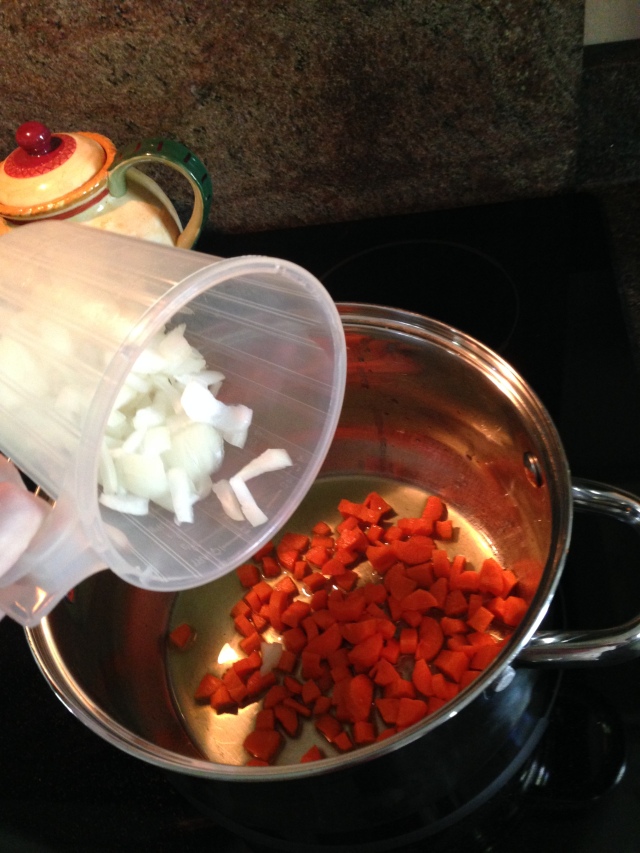
Adding in the onions.

French Sauces via LashesandDashes

Sauteing the mirepoix.

French Sauces via LashesandDashes

Making the Sachet.

French Sauces via LashesandDashes

Adding in the flour to make the roux.

French Sauces via LashesandDashes

Whisking in the Stock.

French Sauces via LashesandDashes

Whisking in the tomato paste.

French Sauces via LashesandDashes

The Espagnole Sauce after adding in the paste.

French Sauces via LashesandDashes

The Espagnole Sauce coming to a boil.

French Sauces via LashesandDashes

Adding in the sachet.

French Sauces via LashesandDashes

Straining the sauce.

French Sauces via LashesandDashes

Adding in the Brown Stock to the Espagnole Sauce to make the Demi-Glace.

French Sauces via LashesandDashes

My little Sous Chef, Arianna.

French Sauces via LashesandDashes

The Demi-Glace boiling.

French Sauces via LashesandDashes

The Demi-Glace.


Clarified Butter

Ingredients 

1 stick unsalted butter

Directions

Heat butter over low heat in heavy bottom sauce pan. Simmer until foam starts to rise to the top of the butter. Begin to skim foam off top of butter, continue to skim foam. The foam is milk solids, keep the milk solids, they are great in mashed potatoes. Remove the clarified butter from heat. Clarified Butter can be kept in fridge for a month.

Espagnole sauce

Ingredients

1 cup onions, diced
½ cup carrots, diced
½ cup celery, diced
2 oz clarified butter
2 oz all-purpose flour
6 cups brown stock
¼ cup tomato purée

For Sachet:
1 bay leaf

½ tsp dried thyme

3-4 fresh parsley stems

4 inch square piece of cheese cloth

1 inch wide  piece of cheese cloth

To make sachet place parsley, thyme, and bay leaf in middle of square cheese cloth. Tie the sachet together with inch wide cheese cloth.

Directions

In a heavy-bottomed saucepan, place clarified butter. Add the mirepoix and sauté for a few minutes until it’s lightly browned. (Mirepoix is just a fancy word for diced carrots, onions, and celery) Don’t let it burn, though. Whisk the flour into the mirepoix a little bit at a time, until it is fully incorporated and forms a thick paste or roux. Lower the heat and cook the roux for another five minutes or so, until it’s light brown. Don’t let it burn! The roux will have a slightly nutty aroma at this point. Using a wire whisk, slowly add the stock and tomato purée to the roux, whisking vigorously to make sure it’s free of lumps. Bring to a boil, lower heat, add the sachet and simmer for about 50 minutes or until the total volume has reduced by about one-third, stirring frequently to make sure the sauce doesn’t scorch at the bottom of the pan. Use a spoon to skim off any impurities that rise to the surface. Remove the sauce from the heat and retrieve the sachet. For an extra smooth consistency, carefully pour the sauce through a strainer. Serve hot. If not serving the sauce right away, keep it covered and warm until you’re ready to use it.

Makes about 1 quart of Espagnole sauce.

Demi-Glace

Ingredients 

2 cups brown stock
2 cups brown sauce (espagnole)
——– For Optional Sachet: ——–
1 bay leaf
½ tsp dried thyme
3-4 fresh parsley stems

Directions

Combine the Espagnole sauce and the brown stock in a heavy-bottomed saucepan. Bring to a boil over medium-high heat, then lower heat to a simmer, add the sachet and reduce for about 20 minutes or until the total volume has reduced by half. Remove pan from heat and retrieve the sachet. Carefully pour the demi-glace through a wire mesh strainer lined with a piece of cheesecloth if you used a sachet.

Makes about 1 pint of demi-glace.

Happy Easter a Week Late with a Recipe for Two Desserts

Lemon Roll Cake via LashesandDashes


Today I bring you my Easter desserts, a week too late. I wrote this post last Monday then life got in the way and I did not get to add the pictures till today. I hope you all had a wonderful Easter spent with Friends and Family celebrating our Saviors Resurrection! We had a wonderful low key Easter, we went to a Sunrise Service right on the beach which was amazing then we spent the afternoon eating dinner with dear friends at our house. Since I love making and eating desserts I offered to make them, I made a Lemon Roll Cake as well as Mini Lemon Cheesecakes. I got the idea to make the Lemon Roll from Crazy for Crust and from there just ran with it. Both desserts turned out wonderful and I know I will be making them many more times in the coming months. One of the reasons I love these desserts is they are so easy to make, the filling for the Lemon Roll is also the base for the Mini Cheesecakes. It is also very light and refreshing and would make a wonderful dessert for the hot summer months. I was actually only planning on making one dessert but then I had a lot of the filling left from the Lemon Roll Cake so I decided to make mini cheesecakes, I used Gingersnaps for my crust on the Mini Cheesecakes since I did not have any Gram Crackers on hand. I hope you all love these desserts as much as I do!


Lemon Roll Cake with Lemon Cheesecake Filling


Lemon Roll Cake via LashesandDashes

Whisking the dry ingredients together.

Lemon Roll Dessert via LashesandDashes

Whisking the eggs.

Lemon Roll Dessert via LashesandDashes

Rolling the lemon to release the juice.

Lemon Roll Dessert via LashesandDashes

Zesting the Lemon.

Lemon Roll Dessert via LashesandDashes

Cutting the Lemon.

Lemon Roll Dessert via LashesandDashes

Juicing the Lemon.


Lemon Roll Dessert via LashesandDashes

Adding in the sugar.

Lemon Roll Dessert via LashesandDashes

Mixing together all of the wet ingredients.

Lemon Roll Dessert via LashesandDashes

Adding in the flour.

Lemon Roll Dessert via LashesandDashes

Carefully spreading the batter into the pan.

Lemon Roll Dessert via LashesandDashes

Batter spread into the pan, thinly.

Lemon Roll Dessert via LashesandDashes

Quickly peeling the cake off of the wax paper.

Lemon Roll Dessert via LashesandDashes

The Lemon Roll off of the old wax paper and onto the new.

Lemon Roll Dessert via LashesandDashes

Rolling the cake so it can cool.

Lemon Roll Dessert via LashesandDashes

Adding the whipping cream into the ice cold mixing bowl.

Lemon Roll Dessert via LashesandDashes

Adding in by small increments the softened cream cheese.

Lemon Roll Dessert via LashesandDashes

Adding in the powdered sugar and lemon extract.


Lemon Roll Dessert via LashesandDashes

The Lemon Cheesecake filling.

Lemon Roll Dessert via LashesandDashes

Spreading the filling on the lemon roll.

Lemon Roll Dessert via LashesandDashes

Re-rolling the Lemon Roll.

Lemon Roll Dessert via LashesandDashes

The Lemon Roll ready to be refrigerated.

Lemon Roll Dessert via LashesandDashes

Wrapping the Lemon Roll for the fridge.


Mini Lemon Cheesecakes

Mini Lemon Cheesecakes via LashesandDashes

Smashing the gingersnaps.

Mini Lemon Cheesecakes via LashesandDashes

Add the cookies crumbs to the mini muffin tin.

Mini Lemon Cheesecakes via LashesandDashes

Spooning the lemon cheesecake filling into mini muffin tin.


Mini Lemon Cheesecakes via LashesandDashes

The filled muffin tin ready to go into the freezer.

Lemon Roll Cake via LashesandDashes


Lemon Roll Cake
3 eggs
1/2 cup granulated sugar
2 tablespoons Lemon Juice (about 1 medium or 1/2 large)
Zest of one lemon
1/4 teaspoon salt
1 teaspoon baking powder
3/4 cup all purpose flour
Powdered sugar, to aid in rolling

Lemon Cheesecake Filling
1/2 cup whipping cream
8 oz cream cheese
5 TBS powdered sugar
1 tsp lemon extract
Directions
Preheat oven to 350 degrees. Line a jelly roll (10″x 15”) pan with wax paper. Beat eggs at high speed for 2 minutes, until frothy and dark yellow. Beat in sugar, lemon juice, and zest. Whisk together salt, baking powder, and flour. Stir into wet ingredients just until blended. Spread in prepared pan. Batter will be in a very thin layer and you will need to use a wooden spoon or spatula to spread it to all the corners of the pan. Bake for 7-9 minutes (mine took 7).
While the cake is baking, place wax paper larger then your jelly roll pan out on a large work surface. Sprinkle liberally with powdered sugar. As soon as the cake comes out of the oven, turn it over on the wax sprinkled with powdered sugar. Using a serrated knife carefully pull cake off of the wax paper it was cooked on. Working at the short end, fold the edge of the wax paper over the cake. Roll tightly, rolling up the cake into the wax paper. Let cool completely while rolled, at least one hour. While the cake is chilling, make the filling. Beat the heavy whipping cream and cream cheese until stiff peaks form. Beat in the lemon extract and powdered sugar. When cake is cool, carefully unroll the cake and place on a clean piece of wax paper. Spread the lemon whipped cream over the cake. (You should have filling left over) Gently but tightly, re-roll the cake and tape close. Chill until it firms up a bit, at least one hour or overnight. Slice and serve. Cake will last covered in the refrigerator for up to 4 days.

Lemon Cheesecake
5 gingersnaps
Leftover lemon filling
12 small muffin tin wrappers
Directions
Crumble 5 gingersnaps, Using the left over filling from the Lemon cake fill 12 small muffin cups. Freeze for several hours or overnight. Serve with small dollop of whipped cream.

Mocha Chiffon Cake with Mocha Chantilly Cream for Valentine’s Day.

This slideshow requires JavaScript.

I made this cake yesterday in between watching the news and weather for updates on the Gridlock and Snow that we have been inundated with over the past 24 hours. As I am writing this post I am watching the Governor of Georgia give an update on the State of Emergency. In my county there were 450 children stuck at school overnight and hundreds of thousands stuck on the roads for upwards of 24 hours. Please say a prayer for all of those who are still stuck in school and on the roads.

Ok enough of that onto the recipe for Valentine’s Day, since it is coming up in a few short weeks I thought I would get a jump on dessert. I used a recipe from my Great Grandma’s Cookbook, with a few tweaks of my own. This cake is wonderful if you want a light cake that is not super sweet! One tip for separating the egg yolks from the whites is to let the eggs come to room temp before separating, this will also help the egg whites whip.

Mocha Chiffon Cake with Mocha Chantilly Cream via LashesandDashes

The Finished cake

Ingredients

3/4 cup strong coffee

1/2 cup unsweetened cocoa powder

1 3/4 cups cake flour

1 3/4 cups sugar

3 tsp baking powder

1 tsp salt

1/2 cup cooking oil

8 unbeaten egg yolks

1 tsp vanilla

8 egg whites

1/2 tsp cream of tartar

Directions

Whisk together the cocoa and coffee, let cool. Sift or using pastry cutter mix together flour and sugar making sure there are no lumps. Add in baking powder and salt, mix together. Make a well and add in order: oil, egg yolks, cooled cocoa mixture, and vanilla, beat until smooth. I used my hand mixer for the batter portion of the cake. Place egg whites and cream of tartar in a large bowl, using a stand mixer whip egg whites until very stiff peaks form. The egg whites should be stiffer than for meringue. Do not underbeat! Gradually pour egg yolk mixture over whipped egg whites, gently fold with spatula until just mixed. Do not Stir! Pour into a greased 4 in deep bundt pan. Cook in a preheated oven at 325 for 55 minutes, then up the oven temp to 350 for 10-15 minutes. Cake is done when top springs back when lightly touched. Immediately turn pan upside down unto cooling rack.

Mocha Chantilly Cream

1 cup heavy cream

3 TBS powdered sugar

1 TBS powdered cocoa

1 TBS Cooled Strong Coffee

Directions

In a chilled bowl with a chilled whisk, whisk on high cream and coffee. When the cream begins to hold its shape add in the cocoa and powdered sugar. Continue to whip until it is stiff. When ready to serve cake dollop the chantilly cream on top. Enjoy!

Glitter Ornament Tutorial

Glitter Ornaments via LashesandDashesFor the past two years I have made Glitter Christmas Ornaments for my Family and Friends. The Ornaments are super easy to make once you get the hang of it! This year on a couple of the ornaments I combined paint and glitter. I also painted faces on a few to make Rudolph the Red Nose Reindeer, and Frosty. Excuse the messy table, it is my crafting table that has seen better days.

Supplies

Floor Wax (I bought mine at Dollar General, but you could also use Pledge Floor Care Multi Surface Finish.)

Fine Glitter

Glass Ornaments

Funnel

Instructions 

Swish water around the glass ornaments, place the ornaments upside down, let dry completely. Place a drop of the floor cleaner in the dry ornaments, swirl the cleaner around the whole ornament, let the excess cleaner drop out of the ornament into the bottle of cleaner. Using a funnel (I made my own out of paper) pour in the glitter, turn the ornament so that the glitter covers the entire ornament. Let the excess glitter fall back into the container of glitter. Place the top with the hook back on ornament. After this step you can either finish or you can add the finishing touches. A few adjustments I made, was using the floor wax as a paint thinner, I mixed together a bit of acrylic paint and the floor wax. Using the same technique I did with the glitter, swirl the paint around the ornament until the ornament is covered. Play around with the paint, you could mix together two colors, or add glitter.

Glitter Christmas Ornament via LashesandDashes

Glitter Christmas Ornament via LashesandDashes

Glitter Christmas Ornament via LashesandDashes

Glitter Christmas Ornament via LashesandDashes

Glitter Christmas Ornament via LashesandDashes

Glitter Christmas Ornament via LashesandDashes

Glitter Christmas Ornament via LashesandDashes

Non- Alcoholic Christmas Sangria

Non- Alcoholic Sangria via LashesandDashesTraditionally we have Punch every Christmas but this year we all decided to try something completely different, Non- Alcoholic Christmas Sangria. I halved the recipe and made a few adjustments to the recipe by The Kitchn . The drink was a big hit in my opinion, I would most definitely make it again! The Sangria was very refreshing, I think it would be great for a hot Summer day! Below I will post the recipe I used, be sure to check out The Kitchn blog and tell her I sent you 🙂

Serves 4

1 cups boiling water
1 black tea bag (or 1 teaspoon loose-leaf tea in an infuser)
1/4 cup sugar
1 1/2 cups pomegranate juice
1/2 cup freshly squeezed orange juice
1 orange, sliced into thin rounds
1 lemon, sliced into thin rounds
1 lime, sliced into thin rounds
1 half apple, cored and cut into 1/2-inch chunks
1 1/2 cups carbonated water

Directions

Pour boiling water over tea bag and steep for 5 minutes. Discard tea bag and stir in sugar to dissolve.In a large jar or pitcher, combine tea, pomegranate juice, orange juice, orange, lemon, lime, and apple. Refrigerate for at least 1 hour and preferably overnight. Just before serving, stir in carbonated water. Serve in glasses over ice.

Christmas Place Settings

Christmas Place Setting via LashesandDashesAt our House my Mom always makes Christmas so special with every detail covered. One of the things she likes to do is make beautiful place settings for our table. This year she asked for my help with some new ideas. Below are three ideas for the Place Settings, I have included two variations for each Setting. When my Mom sets the table for a special occasion she includes a favor for our Guests, just a little extra something special.

Christmas Place Settings via LashesandDashes

For this place setting you will need 1 Dinner Plate, 1 Bread Plate, 1 Cloth Napkin folded into a Square, Gold Silverware, 2 Hershey Kisses still wrapped, 1 Baby Carrot, 5 Chocolate Chips in Christmas Colors, 1 Piece of Red Fabric for Scarf.

I saw a Place Setting Similar to this on Pinterest and decided to do my own take on it.

Christmas Place Setting via LashesandDashes

This Place setting is the same as above but with one small adjustment. For this place setting you will need 1 Dinner Plate, 1 Bread Plate, 1 Cloth Napkin folded into a Square, Gold Silverware, 2 Hershey Kisses unwrapped, 1 Baby Carrot, 6 Chocolate Chips in Christmas Colors, 1 Piece of Red Fabric for Scarf.

The variation for this setting is a very simple one, just unwrap the Hershey Kisses.

Christmas Place Setting via LashesandDashes

For this Place Setting you will need: 1 Bread Plate, 1 Dinner Plate, 1 Christmas Glass, 1 Place Mat in Shape of Christmas Ornament, 1 Cloth Napkin in Shape of Christmas Tree, Silverware

Before this year I had never seen a napkin folded into a tree, it is the hottest trend for Place Settings this year. I will post the how to video below.

Christmas Place Setting via LashesandDashes

Same as above except we put Hershey Kisses in the Folds of the Napkin

The Hershey Kisses would be our Favor on this Place Setting.

Christmas Place Setting via LashesandDashes

For this Setting you will need: 1 Charger Plate, 1 Dinner Plate, 1 Bread Plate, 1 Petit Four, Gold Silverware, 1 Christmas Goblet, 1 Napkin folded into a Fan.

My mom taught me how to fold the napkin into a fan, I will post the tutorial below.

Christmas Place Settings via LashesandDashes

For this Setting you will need: 1 Charger Plate, 1 Dinner Plate, 1 Bread Plate, 1 Petit Four, Gold Silverware, 1 Christmas Goblet, 1 Napkin folded into a Fan 1 Christmas Place Mat.

The Petit Four is from our favorite Bakery in Louisville Heitzman Traditional Bakery and Deli, before we headed back home we picked up several Petit Fours for Christmas and froze them so they would be fresh.  You could also use a favorite cookie or other yummy goody of your choice.

From Our Table to Your Table we wish you the Merrist of Christmas!

Merry Christmas from LashesandDashes

Gaylord Opryland Hotel

Gaylord Opryland Hotel via LashesandDashesOn our way home from Louisville we decided to stop by the Gaylord Opryland Hotel to view their “A Country Christmas”, I have posted the Video Promo below.

We had not been to the Gaylord Opryland Hotel for over 12 years, the last time we went it was absolutely wonderful! We had not been there at Christmas time, and it exceeded our expectations! If you will be traveling through the Nashville area this Christmas I highly recommend taking a pit stop here. No matter what your budget may be, or your interest you will find something to do here. We arrived around 9:30 central time, and decided to walk around inside the Hotel as it was drizzling outside. If you look close enough you can find free parking if not you will have to pay $20 to self park. We made our way downstairs first to see the Holly Jolly Town Square, if you have young children this is a must stop for you! At the Holly Jolly Town Square they have a store where children can buy gifts for family and friends. After this we walked up to the first level to see the Atrium, in the Atrium there is a river flowing through the middle of it that you can ride a River Boat. As we were walking around viewing the live flowers we enjoyed the waterfalls and also the Water Fountain Show. Another feature that is great for families is the Christmassy DreamWorks Experience, when we where walking around the Atrium we saw the ShrekFeast Interactive Character Meal. Before we went to get lunch we walked through the Treasures for the Holidays Craft Show and picked up a few last minute Christmas gifts. We were still on Louisville time and were quite hungry by 11am, we decided to eat at the Jack Daniel’s restaurant, the food was BBQ and was quite good! After lunch the rain had subsided so we went out to the front lawn of the hotel to see the Outdoor Nativity Display, it was beautiful and was a wonderful reminder of the True Reason for the Season!

With out any further adieu the pictures from our visit are below.

Gaylord Opryland Hotel via LashesandDashes

IMG_3680

IMG_3681

IMG_3682

Gaylord Opryland Hotel via LashesandDashes

IMG_3685

IMG_3687 IMG_3688

IMG_3689 IMG_3691

IMG_3694

IMG_3696

IMG_3697

IMG_3699 IMG_3700

IMG_3701

IMG_3703

IMG_3705

IMG_3709

IMG_3710

IMG_3711

IMG_3712 IMG_3713

IMG_3714 IMG_3715

IMG_3717

IMG_3719

IMG_3720

IMG_3722

IMG_3723 IMG_3724

IMG_3725

IMG_3727

IMG_3730

IMG_3731

IMG_3732

IMG_3733

IMG_3734

IMG_3735

IMG_3737

IMG_3739

IMG_3741

IMG_3742

IMG_3743

IMG_3744

IMG_3745

IMG_3746

IMG_3747 IMG_3748

IMG_3749

IMG_3750

IMG_3751

IMG_3752

IMG_3753

IMG_3754

IMG_3755