After we took down all of the Christmas Decorations the house looked really plain, so we decided to go all out on our Valentine’s Day decorations because why not?!? Mom left the honors up to me, and let’s just say I had a ton of fun!

First up on the agenda was to make garland for above the fireplace, I saw a tutorial on Pinterest by One Good Thing by Jillee for a Simple Heart Crafts and decided to do my own take on it. I will take you step by step for each tutorial, let me know if you try any of these tutorials! Keep in mind the number of strips of paper you will need is based on the length of garland you want, my garland is roughly 5 1/2 feet long.
Supplies for Double Heart Garland
30 strips of cardstock 1 inch wide. The patterned paper was 12 inches long and the red cardstock was 11 inches long.
Pencil
Stapler
Hot glue gun


Fold the two ends unto each other making sure they are even, you will start to see the shape of the heart but do not crease the paper just yet.

Staple the two ends together half an inch from the ends.

Now using your finger make a slight crease at the bottom of the heart, do not fold the heart to make the crease as this would take away from the soft shape of the heart.
Continue the above steps with half of your strips of paper.
Since I had a mixture of patterned paper and cardstock I choose to do half patterned paper and half cardstock, this looks better for the garland.

Now using the other half of the cut strips of paper, make a slight crease in the middle of the paper.
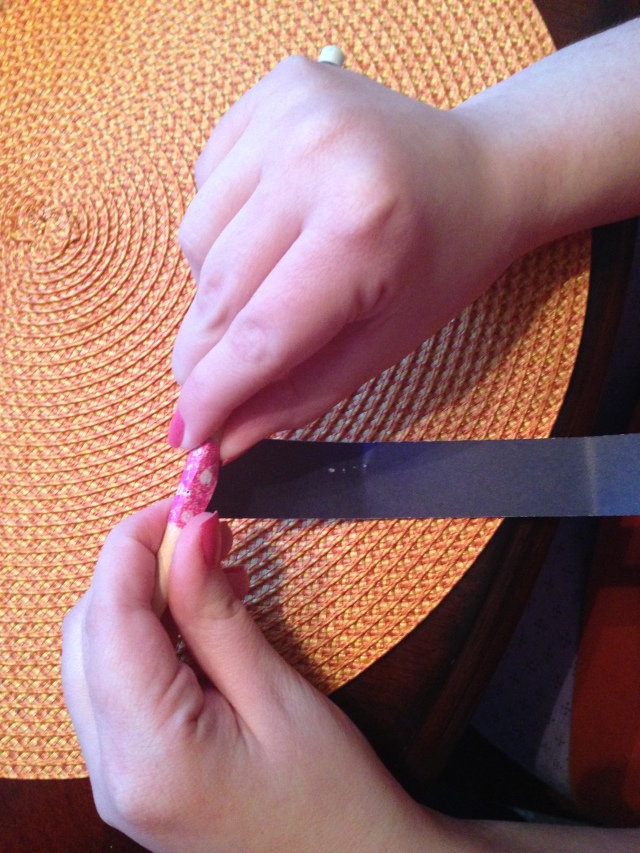
Start to roll one end of the strip on the pencil, continue roll the paper until you have almost reached the middle of the paper where you creased it.

Continue the above step for the other side of the paper.

You should now have a heart with curly cues, if the crease on the bottom of the heart is not deep enough now is the time to crease it again to reach the heart effect. Each curly cue heart will be a bit different, which if you are a perfectionist like me could bother you but I decided it gave them character.
Now we begin the process of putting the garland together.
Using the stapler, staple two of the large hearts together at an angle almost in the shape of a U. I have learned from experience if you staple the hearts in a straight line the garland will not work. Continue the stapling process until you have stapled all of the large hearts together.

Take the curly cue hearts and place them in the middle of the large heart garland, if the large heart was patterned paper I used a red curly cue heart.

A close up of the large hearts with the curly cue inside.
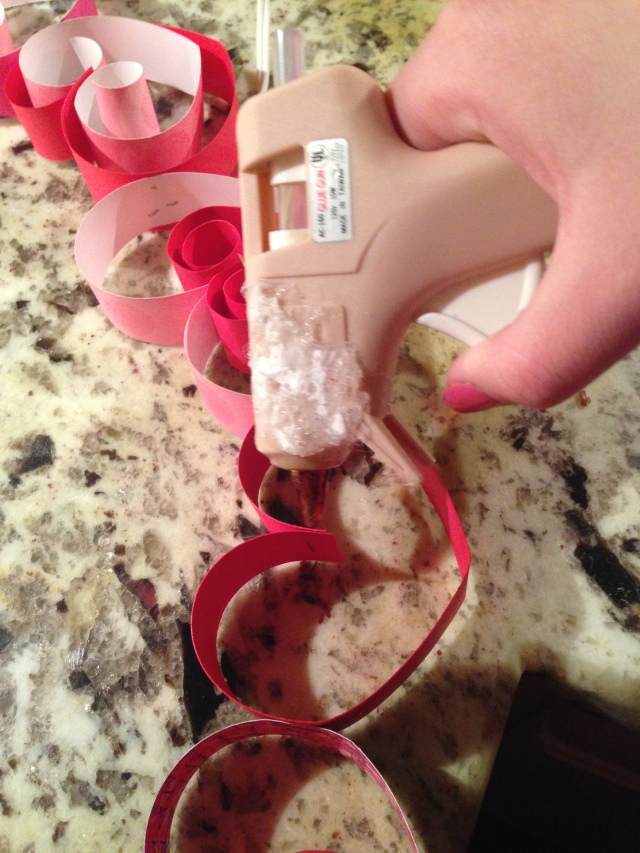
Using the glue gun place a small dot of glue on each side of the large heart.
 Now take the curly cue heart and pinch it onto the large heart. Continue until the hearts are all glued on.
We have small hooks underneath our hearth so I cut two small pieces of red ribbon and tied it on each end of the garland and hooked it underneath the mantel.
After I made the garland I moved onto the Flower Topiary, I decided to make two Topiaries, one for each side of the mantel. I based the Topiary loosely off of Classy Clutters Tutorial. The Topiary Tree is not hard to make but it does take time, I put together the trees in a afternoon and evening. The flowers are super easy to make once you get the hang of it, it took me a couple tries to get the technique down but once I did I could whip a flower together in under two minutes. On a side note the trees would be a wonderful center piece for a DIY wedding or any special occasion.
Supplies for Topiary
2 6 inch round foam balls
1 dowel rod 1 inch in diameter
2 Plastic Pots 6 1/2 inch in diameter
48 pearl corsage pins (You may need more depending on the size of the flowers)
2 rolls of crepe paper
2 foam blocks
Brown Paint

All of the supplies set out, ready to be crafted into beautiful Trees!

Start by cutting the dowel rod in half, then stick the rod into the foam blocks. Use smaller pieces of the foam block to stabilize the dowel rod in the pot.

Begin to push the foam ball onto the dowel rod making sure to push the ball straight onto the rod.

Cut the crepe paper into a 4 foot strip (If you would like smaller flowers cut a smaller section of crepe paper) cutting the paper at an angle. Begin to fold the crepe paper into a fan folding it in a circular motion, continue folding the paper, once you have made a full circle continue ruffling the paper to make layers of the flower. You will see it begin to take shape after you have gone around the circle a few times. Continue ruffling the paper until you have a half inch left, fold the excess paper onto the back of the flower covering the last few folds you made. Stick the corsage pin into the flower from the front making sure to go through the middle of the flower where the folds are. Stick the flower into the foam ball. Continue this process until the whole ball is covered.


After I finished with the flowers I painted the dowel rod with brown paint, you could also paint the dowel rod before you begin the assembly of the Topiary.
The finished Valentine’s Day Mantel.


To add a little sparkle to the kitchen I also decorated the table.

I used Conversation Hearts in the Vase with a Flameless Candle.


